Once I finish the shoulder seams, I start to finish the neck.
This is how the neck bands look like on the two nightgowns for the twins.

Dupa ce am cusut si finisat umerii, pun banda de la gat. Asa arata gatul finisat pe cele doua camasi de noapte ale nepotelelor mele, gemene.
I finished the neck bands with a tiny zigzag (above) and with a decorative stitch (below).
As you can see a very simple sewing machine with a zigzag can sew a very nice neck band, if you do not have a lot of fancy decorative stitches or do not want to use a double needle.
Finisez banda cu un zigzag mic sau cu un punct decorativ de la masina mea (prima poza). Dupa cum puteti vedea in poza de mai jos, o masina simpla de cusut, care nu coase decat drept si cu zigzag, finiseaza foarte frumos gatul la un tricou. Nu ai nevoie de puncte decorative complicate sau de ac dublu.

MY MACHINE SETTINGS / SETAREA LA MASINA MEA
I sew the neckband with a tiny zigzag (1.5 width, 1.5 length), like I saw Pam Howard on Craftsy. Linda Lee and Marcy Tilton sew with a straight stitch. Jalie recommends to stretch the knit, if you sew with the straight stitch. I find it easier to use Pam Howard's method. You can use a slightly narrower zigzag and a longer stitch (0.5 - 0.7 width, 2.0 length). See what you prefer to use.
Cos banda de la gat cu un zigzag foarte ingust (1.5 x 1.5), asa cum am vazut ca face Pam Howard pe Craftsy. Linda Lee si Marcy Tilton (tot pe Craftsy sau in carti) cos cu punct drept. Firma de tipare Jalie recomanda cusutul cu punct drept, dar intinzand in acelasi timp materialul cand cosi. Eu am adoptat acum metoda lui Pam Howard si raman - deocamdat? - la ea.
Puteti insa folosi un zigzag mai ingust, combinat cu o lungime a pasului mai mare (0.5-0.7 latimea zigzagului, 2.0 lungimea pasului).
My sewing machine has a memory, which is a very convenient feature. I keep the settings I use for knits in the same folder and I switch between them, if needed. If you do not have this feature on your sewing machine, keep a notebook with your settings. It will make your work so much easier.
Masina mea de cusut are din fericire memorie, in care pot pastra anumite setari. Mi-am facut o mapa in care pastrez setarile cu care cos de obicei tricotajele. Daca deschid mapa, pot sa trec de la o setare la alta.
Daca nu aveti o masina de cusut cu memorie, va sfatuiesc sa notati setarile preferate intr-un caiet, pe care sa-l puteti consulta ori de cate ori aveti nevoie.

My settings:
* for the tiny zigzag to topstitch the neckband: 2.0 width, 1.25 length
* honey comb stitch: 5.5 width, 2.20 length
* straight seams with elasticity (neck band, sleeve cap, side seams): 1.5 width, 1.5 length
* straight seams without elasticity (shoulder seams): 2.0 - 2.5 (topstitch) length.
Setarile mele:
* zigzagul decorativ cu care termin banda: 2.0 latime si 1.25 pasul
* punctul decorativ (fagure de miere): 5.5 latime, 2.2 lungime
* cusaturile drepte, care trebuie sa ramana elastice (banda la gat, capul manecii, partile laterale) 1.5 latime, 1.5 pasul
* cusaturile drepte care trebuie sa fie elastice (umarul si tivul de la banda gatului, inainte de a fi aplicata) 2.0-2.5 pasul.
LENGTH OF THE NECK BAND / LUNGIMEA BENZII DE LA GAT
I tried different methods: I used the neck band from the pattern, I calculated the length using the length of the neck opening (Linda Lee and Sarah Veblen), I stretched the band as I stitched it to the bodice (Marcy Tilton and Pam Howard).
The first method is tricky, because you may have a fabric which is more stretchy than the fabric the pattern was drafted for. The method used by Marcy Tilton and Linda Lee requires some experience and practice, you may not have. The second method is the one I use now, because I find it the easiest one.
Am incercat diferite metode: am folosit tiparul de banda dat de designer, am calculat lungimea benzii in functie de lungimea totala a liniei de cusut de pe tipar (Linda Lee) si am cusut o banda mult mai lunga, intinzand-o atat cat trebuei si taind surplusul (Marcy Tilton si Pam Howard).
prima metoda (tiparul benzii) poate fi oarecum riscanta, fiindca nu stii care este elasticitatea materialului pe care designerul l-a avut in vedere si te poti trezi cu o banda prea lunga sau prea scurta.
Metoda folosita de marcy Tilton si Linda Lee e si ea mai riscanta, fiindca trebuie sa stii cat de multi trebuie sa intinzi banda: poti sa o intinzi prea mult sau prea putin, daca nu ai suficienta experienta. Dar poti sa inveti, fara discutie.
Metoda pe care o folosesc eu acum se bazeaza pe o formula, pe care am invatat-o de la Linda Lee si Sarah Veblen..

I measure the neck line on the SEWING LINE of the pattern, front and back. Add those numbers together to get the total length (if you measure only the half of the front neck and the half of the back neck on the pattern, multiply those numbers by 2, before adding them to get the total length).
Masor lungimea gatului pe tiparul de la fata si spatele corsajului. Nu pe linia de taiat (marginea tivului), ci pe linia pe care cosi. Linia de la tiparul de la Burda sau de la Ottobre, care nu au tivuri adaugate.
Atentie: daca aveti un tipar care este numai jumatatea fetei sau a spatelui, trebuie sa dublati lungimea masurata, pentru ca aveti nevoie de lungimea TOTALA a gatului.
I recently watched a class about sewing with knits where the formula was:
>> total length minus 1"-2" <<.
Not precise enough for me, so I stick with 7/8 x neck length.
Am vazut de curand un dvd despre cusutul tricotajelor. Acolo se folosea formula >> lungimea totala a gatului MINUS 2,5 - 5 cm <<.
Formula asta nu este duficient de precisa dupa gustul meu, asa ca raman la formula "7/8 x L".
WIDTH OF THE NECK BAND / LATIMEA BENZII DE LA GAT
I tried different widths, to discover that my favourite width for t-shirts for children is 2 1/2" (double) trimmed to 2"(double) and 1" final band to be sewn on the garment.
Am incercat diferite latimi, ca sa descoper care este latimea ideala pentru tricourile de copii. Am ramas la o latime de 6,5 cm, pe care o tai dupa ce am calcat-o dubla, ca sa raman cu 5 cm (2x2,5). Cos deci cu o banda de 5 cm pe care o indoi pe lungime la jumatate (2,5 cm).
On these pictures I started with a band 2 1/2" wide, which I trimmed down to 2 1/4 " (1 1/8" x 2). This is the widest band I shall ever use for a child.
In pozele pe care le vedeti am taiat banda de 6,5 cm (indoita) sa ramana la o latime finala (dublata) de 2,85 cm - eu masor tivurile in sistemul american. Gasesc ca e mult mai simplu de masurat, fiindca liniile sunt mult usor de vazut pe rigla si folosesc latimi standard.
Ca sa simplific, ce folosesc de acum inainte: banda dublata, pe care incep sa o cos are 2,5 cm indoita pe lungime si deci cu largimea totala de 5 cm. Scuze, daca v-am zapacit.
I used larger bands, but they are not sitting nice, after I finished them. In the future I will sew with a band of 1" width, after the final trimming, not 1 1/8" (like you see below).
If I want a wider band, I will have to lower the neck line on the pattern.
Am folosit si benzi mai largi, dar nu sunt atat de frumoase, pentru ca se onduleaza usor la margine si nu sunt foarte placute la purtat pentru copil. Daca vreau o banda mai larga, trebuie sa adancesc in orice caz linia gatului.
Why you have to start with a wider band and trim it down?
I saw this method in Marcy Tilton's class on Craftsy, but I did not use it, until this project (the light blue night gowns), when I had to trim the width. Now I understand why she does it: the neck band will not roll, if you trim it while it is double.
De ce incep cu o banda mai lata de 6.5 cm si o tai dupa aceea la 5 cm?
Am vazut metoda asta la Marcy Tilton pe Craftsy, dar nu am folosit-o pana acum, cand am fost nevoita sa tai din latimea benzii de 6,5 cm, care era mult prea larga. A fost din intamplare, dar m-a facut sa inteleg de ce face ea asta: marginile benzii nu se ruleaza daca le tai in timp ce banda este calcata duble, raman 'lipite' una de alta.
You do not have to do this. A neck band cut with the final width, without extra trimming, works as well, even if it is not as easy to apply it, if the edges roll.
Nu e nevoie sa faceti si voi asa ceva. O banda taiata la latimea definitva se poate coase foarte bine, chiar daca e o idee mai putin simplu de aplicat.

NB. I cut the band with 3/8" (2 cm) extra length, which will be the seam allowances when I close it.
Banda o tai cu 2 cm in plus pe lungime, ca sa o pot coase.
PREPARING THE NECK BAND AND THE BODICE / PREGATIREA GATULUI SI BENZII PENTRU CUSUT
Press it double while it is flat. It is much more difficult to press double a neck band, if it is already closed.
Presati banda in doua pe lungime inainte de a o coase sa formeze un cerc. Este mult mai greu sa o calci, dupa ce ai cusut-o.
Sew the short edges of the neck band and trim the seam allowances. Use a straight stitch (I use 2.0 - 2.5 length).
Se cos dupa aceea capetele pe linia marcata si se taie tivul de 1 cm la 0.5 cm. Cos cu pas drept de 2.0-2.5.

Turn the neckband and press it, on the right side.
Se intoarce acum banda pe fata si se mai calca inca o data (tivurile se desfac si se suprapun).
'QUARTER' THE NECK BAND AND THE BODICE NECK / IMPARTITI BANDA SI GATUL IN SFERTURI EGALE
Start pinning together the centre front to the centre back on the bodice. Walk the edges of the cutting edge together to find the other points to quarter the neck cutting edge. You can see that these points are not on the shoulder.
Puneti un ac de gamalie la gat, pe mijlocul fetei si pe mijlocul spatelui. Dupa aceea suprapuneti aceste doua ace si prindeti-le cu un alt ac de gamalie. Suprapuneti tivurile si aflati unde sunt cele doua puncte care macheaza sferturile gatului (poza de mai jos). Veti vedea ca aceste puncte nu sunt pe linia umarului.

The more scooped the neck line is, the bigger the distance from the shoulder line will be, because a scooped front neck will be much longer than the back neck and when you quarter the length... Easy to understand, don't you think?
Cu cat este gatul mai decoltat, cu atat lungimea liniei de gat de la fata va fi mai mare decat gatul de la spate si acele de gamalie vor fi si mai mult plasate spre mijlocul fetei. Dat fiind ca avem nevoie de sferturile matematice ale liniei de la gat, nu mi se pare gru de inteles.
The minimum of marking points are 4 (quartering the neck line). I like to put 4 more extra pins, which will divide my neck line and the band by 8, not by 4.
Minimumul de puncte de care eveti nevoie ca sa puneti banda de la gat este de 4 (impartirea in sferturi). Eu prefer sa impart si fiecare sfert in doua, deci am 8 segmente egale, nu 4.
Divide the neck band by 4 or by 8, using the same method.
Acum impartiti si banda de la gat in 4 sau 8 segmente egale, folosind aceeasi metoda.

Pay attention how the pins are placed. It is easier to see them when you pin the neck band to the garment.
Fiti atente cum sunt acele puse, care este directia varfurilor. E mai usor sa le vezi si sa le scoti, daca le pui in acest fel.
PINNING THE NECKBAND TO THE BODICE / ATASAREA BENZII LA GATUL CORSAJULUI
Place the neck band on the RIGHT side of the garment, as you can see in the picture below. The seam line (where you joined the neck band in the round) should be placed on the centre back. It has two advantages: (1) it is not visible on the front (I made once the mistake to put it on the centre front; not a crime, but also not very nice) and (2) you can teach young children which is the back of the garment, if they look for that little seam.
Puneti banda cu fata pe FATA corsajului, asa cum arat in poza de mai jos. Cusatura de pe banda trebuie pusa pe mijlocul spatelui, pemntru ca avenm doua avantaje: (1) nu se vede cusatura pe fata tricoului si (2) ii puteti invata pe copii mai mici care este spatele tricoului, cand se imbraca singuri: acolo unde este cusatura de pe banda.
Acum trebuie sa va marturisesc ca eu am gresit o data si am pus cusaura benzii pe mijlocul fetei. Nu este o crima, dar nici nu sunt mandra de acea banda si de cum arata gatul.

Start pinning the neck band to the garment at the centre back (the pin in the right corner, below)...
Incepeti sa puneti ace de gamalie pornind de la centrul spatelui (acul de gamalie dindreapta, jos, in poza de mai jos)...

... than pin the next 2 pins on the neck band and the garment together: the 2 pins one on the top of the other, in the picture above; the third pin in the picture below.
I put another pin between them, stretching the neck band to equal the portion of the neck between the 2 pins.
... apoi puneti un ac de gamalie acolo unde se suprapun urmatoarele ace de gamalie de pe banda si de pe gat (cele doua ace de gamalie suprapuse, in poza de mai sus si acul al treilea din poza de mai jos).
Eu mai pun inca un ac intre ele (poza de mai jos), exact la mijlocul distantei dintre cele doua ace deja puse. Pentru asta trebuie sa intind putin de banda, ca sa fie egala in lungime cu portiunea respectiva de gat.

I have to stretch, because - as you can see below - the neck band (double layer) is narrower than the neckline on the bodice.
Trebuie sa intindeti putin de banda, pentru ca vedeti (mai jos) ca gatul de pe corsaj este mei lung.

Don't worry if the neck looks now like a porcupine with so many pins. I shall take them off, after I baste the edge of the neck.
Nu va ingrijorati ca puneti prea multe ace de gamalie si ca gatul va arata ca un arici, inainte de a-l coase. Acele de gamalie se scot, in timp ce insailez gatul.

BASTING THE NECK BAND TO THE BODICE / INSAILAREA BENZII
I like to baste the neck band to the bodice. Why I do that? Because I can get rid of all those pins and I keep the layers together when I stitch the neck band. Stitching will be a breeze! Especially for beginners.
Am descoperit ca metoda mea de insailare a benzii de la gat ma ajuta sa cos mai usor: scap de acele de gamalie si nu mai trebuie sa trag de banda si sa aranjez marginile cand cos. Cusutul devine in acest fel 'floare la ureche'. Recomand mai ales incepatoarelor sa faca asa.
I am stitching from the WRONG side, where I already marked the neck line before I started to sew the shoulder line. This is an important step for me, which allows me to have a perfect neck line, without stretching and pulling the fabric to match the edges to a certain point on the throat plate or the foot. I sew on the line, very easy and simple! With the best possible result.
Another advantage is that the edges will not roll, when I sew or serge.
Cos pe DOSUL tricoului, unde am deja marcata linia de cusut a gatului. Am marcat-o inainte de a coase umarul, dupa cum poate ati observat deja. Marcarea este un pas important, care ma ajuta sa cos o linie de gat perfecta. Nu trebuie sa ma stresez daca marginile sunt perfect aliniate cand cos, nu trebuie sa trag in toate partile de banda sau de corsaj, daca fug de sub ac. Nu trebuie sa ma chinuiesc sa urmaresc constant un anumit punct de pe piciorus sau de pe placa masinii de cusut, ca sa stiu ca banda va avea aceesi latime peste tot.
Cos foarte simplu pe linia marcata, stiind ca rezultatul va fi perfect.
Un alt avantaj este ca marginile nu se ruleaza cand cos sau cand surfilez.

I baste with the cheap cotton basting thread, which will be cut off when I serge, as you will see. I baste with small stitches, as close to the edges as possible, stretching the neck band's edges to match the bodice edges.
Insailez cu ata de bumbac prost, pentru ca nu trebuie sa o scot din cusatura. O tai cand surfilez (sau dupa ce as trage un zigzag, cand finisez cusatura interioara). Insailez cu pasi cat mai mici si am grija ca cele trei straturi sa se suprapuna pe marginea taiata.
Below is the neck with and without pins. Sewing two nightgowns at the same time (for twins or not) gives me the opportunity to show how the sewing evolves.
Vedeti mai jos gatul pregatit sa fie cusut: unul are inca ace de gamalie, al doilea este deja insailat. Cusand doua camasi de noapte in acelasi timp (pentru gemene sau pentru alti copii) pot sa fotografiez doua stadii de cusut, unul langa altul.


When I sew, I stretch the band to match the bodice. Don't stretch the bodice, only the band! Don't stretch to sew on a straight, vertical line, but follow the way the neck line is on the garment: ROUND!!! You have to keep the bodice completely flat and in the original form and stretch the band to match it.
Cand cos, am grija sa intind banda ca sa fie de aceeasi lungime cu portiunea de gat de pe corsaj pe care o cos. Corsajul nu trebuie intins!!!
Cand coaseti nu trebuie sa intindeti banda ca sa coaseti pe o linie dreapta, verticala. Trebuie sa coaseti pastrand linia gatului curba, asa cum este pe tipar. Corsajul trebuie sa isi mentina forma originala si banda intinsa sa se adapteze formei corsajului.

The neck band is attached to the bodice (below). As you see I have a wide seam allowance I have to trim. I like having this wide seam allowance of 1/2" (the width of my seam allowance on the neck of the bodice pattern pieces), which will make trimming with the serger much easier than a seam allowance of 1/4".
Acum am cusut deja banda de gatul tricoului (poza de mai jos). Tivul este - dupa cum vedeti - destul de lat. Mai exact, are latimea tivului de la gat (1,25 cm). Find atat de lat, imi va veni mai usor sa sufilez la overlock. Tivul final, dupa ce surfilez, va fi de 0,5 cm (mai exact 0,6 cm).

SERGING THE SEAM ALLOWANCE OF THE NECK BAND / SURFILAREA LA OVERLOCK
I will write about it shortly, because not everybody has a serger and those using it, will understand very well what I mean to say.
Am sa scriu acum ceva, foarte pe scurt, despre felul in care surfilez. Nu toata lumea are o masina de surfilat si cine are, intelege ce vreau sa spun.

I learned from Martha Pullen that you never start at the centre back (like I did before), because the seam allowance of the neck band it always shows on the back of the garment, when you do not wear the it.
You start on the front, just below the shoulder seam.
Am invatat de la Martha Pullen ca nu trebuie sa incepi sa surfilezi la mijlocul spatelui, asa cum incepi sa cosi banda si cum surfilam eu inainte. Tocmai partea de la mijlocul spatelui este partea care se vede, atunci cand nu porti haina.
Incepi sa surfilezi pe piept, sub cusatura umarului.
May be I shall write another time how I start and finish on the serger.
Poate am sa scriu alta data cum se incepe si cum se incheie cusatura la overlock.
This is how the neck looks before being pressed and topstitched.
Iata cum arata gatul inainte de a fi calcat si cusut cu cusatura finala, decorativa.

PRESSING AND TOPSTITCHING THE NECK BAND / CALCAREA SI ULTIMA CUSATURA
You press the neck band on a hem. Then you top stitch it.
Intai se calca gatul pe o pernuta de calcat si apoi se mai caose inca o cusatura ca sa previna banda sa se ruleze.
You can use a double needle (I do not use it), or a cover lock (I have it, but I do not use it, because I hate the idea that pulling one thread will unravel my whole topstitching; you see, I like to make things to last very long).
Puteti folosi un ac dublu (nu fac!) sau un overlock (am si masina asta, dar nu-mi place sa o folosesc, pentru ca detest ideea ca daca se rupe ata de pe dos, toata cusatura se va desira; imi place sa fac lucruri de care stiu ca sunt foarte rezistente).
I like using the sewing machine. To be honest, the most important motif is that I do not have to switch to another machine. I only go as far as the serger, which I learned to love very slowly (Ela from Focsani could testify how reluctant I was to buy a serger).
Mie imi place sa folosesc masina de cusut. Ca sa fiu sincera, motivul principal ester ca imi e lene sa ma mut pe alta masina. Singura exceptie este masina overlock, pe care am inceput sa o apreciez incet cu incet. Ela din Focsani poate depune marturie cata aversiune am avut la inceput ca sa cumper un overlock).
This is the zigzag stitch ...
Asta este punctul simplu de zigzag...

... and this is the honey comb stitch
... si asta este punctul decorativ 'fagure de miere'

I overlap 2-3 stitches when I finish the round neck, I backstitch 2-3 stitches, I cut the thread, leaving long tails, I pull the top thread to the back, make a knot and burry it in the seam. You can see the tails in the first picture of this posting.
Cos pana ajung la punctul de pornire. mai cos 2-3 pasi peste ce este deja cusut, dau 2-3 pasi inapoi si apoi tai, lasand capetele de ata mai lungi. Trag ata de sus pe dos, fac un nod dublu si ' ingrop' atele in tiv.n prima poza, cea cu care am inceput postarea, puteti vedea firele de ata, inainte de face nodul.
In that picture you see that I made the mistake to start the topstitching at the centre back and the back sticking is visible. I should have followed Martha Pullen's advice to start on the front side, near the shoulder seam!
In aceeasi poza mai vedeti ca am gresit si am inceput sa surfilez pe mijlocul spatelui. Trebuia sa fi urmat sfatul dat de Martha Pullen sa incep pe piept, sun cusatura umarului.
One more pressing and your neck is nicely done! You may like to sew with 4 pins, without basting, but this is how I sew.
Am calcati inca o data si - nellyk - ai terminal si gatul. Poate preferati sa coaseti cu 4 ace de gamalie pe banda si fara insailt. V-am aratat numai cum fac eu.
OTHER POSTINGS FROM THESE SERIES / POSTARI ANTERIOARE DIN ACEASTA SERIE:
Construction of a knit nightgown (I) / Cum se coase o camasa de noapte din tricotaj (I)
Construction of a knit nightgown, shoulders (II) / Cum se coase o camasa de noapte din tricotaj, umerii (II)
This is how the neck bands look like on the two nightgowns for the twins.

Dupa ce am cusut si finisat umerii, pun banda de la gat. Asa arata gatul finisat pe cele doua camasi de noapte ale nepotelelor mele, gemene.
I finished the neck bands with a tiny zigzag (above) and with a decorative stitch (below).
As you can see a very simple sewing machine with a zigzag can sew a very nice neck band, if you do not have a lot of fancy decorative stitches or do not want to use a double needle.
Finisez banda cu un zigzag mic sau cu un punct decorativ de la masina mea (prima poza). Dupa cum puteti vedea in poza de mai jos, o masina simpla de cusut, care nu coase decat drept si cu zigzag, finiseaza foarte frumos gatul la un tricou. Nu ai nevoie de puncte decorative complicate sau de ac dublu.

MY MACHINE SETTINGS / SETAREA LA MASINA MEA
I sew the neckband with a tiny zigzag (1.5 width, 1.5 length), like I saw Pam Howard on Craftsy. Linda Lee and Marcy Tilton sew with a straight stitch. Jalie recommends to stretch the knit, if you sew with the straight stitch. I find it easier to use Pam Howard's method. You can use a slightly narrower zigzag and a longer stitch (0.5 - 0.7 width, 2.0 length). See what you prefer to use.
Cos banda de la gat cu un zigzag foarte ingust (1.5 x 1.5), asa cum am vazut ca face Pam Howard pe Craftsy. Linda Lee si Marcy Tilton (tot pe Craftsy sau in carti) cos cu punct drept. Firma de tipare Jalie recomanda cusutul cu punct drept, dar intinzand in acelasi timp materialul cand cosi. Eu am adoptat acum metoda lui Pam Howard si raman - deocamdat? - la ea.
Puteti insa folosi un zigzag mai ingust, combinat cu o lungime a pasului mai mare (0.5-0.7 latimea zigzagului, 2.0 lungimea pasului).
My sewing machine has a memory, which is a very convenient feature. I keep the settings I use for knits in the same folder and I switch between them, if needed. If you do not have this feature on your sewing machine, keep a notebook with your settings. It will make your work so much easier.
Masina mea de cusut are din fericire memorie, in care pot pastra anumite setari. Mi-am facut o mapa in care pastrez setarile cu care cos de obicei tricotajele. Daca deschid mapa, pot sa trec de la o setare la alta.
Daca nu aveti o masina de cusut cu memorie, va sfatuiesc sa notati setarile preferate intr-un caiet, pe care sa-l puteti consulta ori de cate ori aveti nevoie.

My settings:
* for the tiny zigzag to topstitch the neckband: 2.0 width, 1.25 length
* honey comb stitch: 5.5 width, 2.20 length
* straight seams with elasticity (neck band, sleeve cap, side seams): 1.5 width, 1.5 length
* straight seams without elasticity (shoulder seams): 2.0 - 2.5 (topstitch) length.
Setarile mele:
* zigzagul decorativ cu care termin banda: 2.0 latime si 1.25 pasul
* punctul decorativ (fagure de miere): 5.5 latime, 2.2 lungime
* cusaturile drepte, care trebuie sa ramana elastice (banda la gat, capul manecii, partile laterale) 1.5 latime, 1.5 pasul
* cusaturile drepte care trebuie sa fie elastice (umarul si tivul de la banda gatului, inainte de a fi aplicata) 2.0-2.5 pasul.
LENGTH OF THE NECK BAND / LUNGIMEA BENZII DE LA GAT
I tried different methods: I used the neck band from the pattern, I calculated the length using the length of the neck opening (Linda Lee and Sarah Veblen), I stretched the band as I stitched it to the bodice (Marcy Tilton and Pam Howard).
The first method is tricky, because you may have a fabric which is more stretchy than the fabric the pattern was drafted for. The method used by Marcy Tilton and Linda Lee requires some experience and practice, you may not have. The second method is the one I use now, because I find it the easiest one.
Am incercat diferite metode: am folosit tiparul de banda dat de designer, am calculat lungimea benzii in functie de lungimea totala a liniei de cusut de pe tipar (Linda Lee) si am cusut o banda mult mai lunga, intinzand-o atat cat trebuei si taind surplusul (Marcy Tilton si Pam Howard).
prima metoda (tiparul benzii) poate fi oarecum riscanta, fiindca nu stii care este elasticitatea materialului pe care designerul l-a avut in vedere si te poti trezi cu o banda prea lunga sau prea scurta.
Metoda folosita de marcy Tilton si Linda Lee e si ea mai riscanta, fiindca trebuie sa stii cat de multi trebuie sa intinzi banda: poti sa o intinzi prea mult sau prea putin, daca nu ai suficienta experienta. Dar poti sa inveti, fara discutie.
Metoda pe care o folosesc eu acum se bazeaza pe o formula, pe care am invatat-o de la Linda Lee si Sarah Veblen..

I measure the neck line on the SEWING LINE of the pattern, front and back. Add those numbers together to get the total length (if you measure only the half of the front neck and the half of the back neck on the pattern, multiply those numbers by 2, before adding them to get the total length).
Masor lungimea gatului pe tiparul de la fata si spatele corsajului. Nu pe linia de taiat (marginea tivului), ci pe linia pe care cosi. Linia de la tiparul de la Burda sau de la Ottobre, care nu au tivuri adaugate.
Atentie: daca aveti un tipar care este numai jumatatea fetei sau a spatelui, trebuie sa dublati lungimea masurata, pentru ca aveti nevoie de lungimea TOTALA a gatului.
The formula for the neck band length is:
>> Total neck length x 7/8 <<
Formula lungimii benzii de la gat este
>> 7/8 x Lungimea totala a gatului <<
I recently watched a class about sewing with knits where the formula was:
>> total length minus 1"-2" <<.
Not precise enough for me, so I stick with 7/8 x neck length.
Am vazut de curand un dvd despre cusutul tricotajelor. Acolo se folosea formula >> lungimea totala a gatului MINUS 2,5 - 5 cm <<.
Formula asta nu este duficient de precisa dupa gustul meu, asa ca raman la formula "7/8 x L".
WIDTH OF THE NECK BAND / LATIMEA BENZII DE LA GAT
I tried different widths, to discover that my favourite width for t-shirts for children is 2 1/2" (double) trimmed to 2"(double) and 1" final band to be sewn on the garment.
Am incercat diferite latimi, ca sa descoper care este latimea ideala pentru tricourile de copii. Am ramas la o latime de 6,5 cm, pe care o tai dupa ce am calcat-o dubla, ca sa raman cu 5 cm (2x2,5). Cos deci cu o banda de 5 cm pe care o indoi pe lungime la jumatate (2,5 cm).
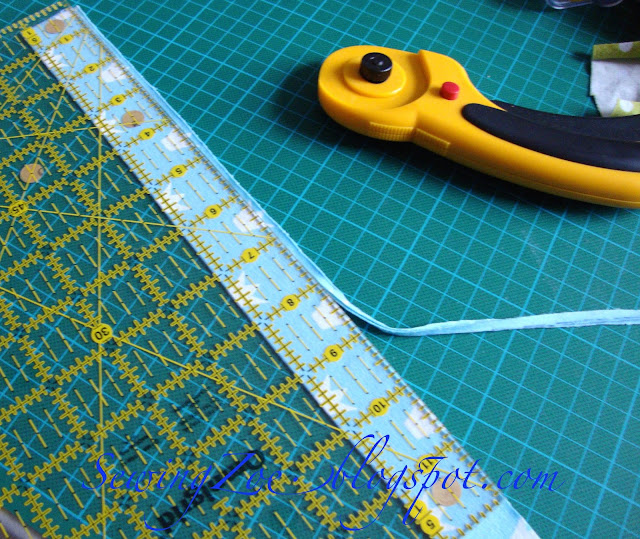
On these pictures I started with a band 2 1/2" wide, which I trimmed down to 2 1/4 " (1 1/8" x 2). This is the widest band I shall ever use for a child.
In pozele pe care le vedeti am taiat banda de 6,5 cm (indoita) sa ramana la o latime finala (dublata) de 2,85 cm - eu masor tivurile in sistemul american. Gasesc ca e mult mai simplu de masurat, fiindca liniile sunt mult usor de vazut pe rigla si folosesc latimi standard.
Ca sa simplific, ce folosesc de acum inainte: banda dublata, pe care incep sa o cos are 2,5 cm indoita pe lungime si deci cu largimea totala de 5 cm. Scuze, daca v-am zapacit.
I used larger bands, but they are not sitting nice, after I finished them. In the future I will sew with a band of 1" width, after the final trimming, not 1 1/8" (like you see below).
If I want a wider band, I will have to lower the neck line on the pattern.
Am folosit si benzi mai largi, dar nu sunt atat de frumoase, pentru ca se onduleaza usor la margine si nu sunt foarte placute la purtat pentru copil. Daca vreau o banda mai larga, trebuie sa adancesc in orice caz linia gatului.

Why you have to start with a wider band and trim it down?
I saw this method in Marcy Tilton's class on Craftsy, but I did not use it, until this project (the light blue night gowns), when I had to trim the width. Now I understand why she does it: the neck band will not roll, if you trim it while it is double.
De ce incep cu o banda mai lata de 6.5 cm si o tai dupa aceea la 5 cm?
Am vazut metoda asta la Marcy Tilton pe Craftsy, dar nu am folosit-o pana acum, cand am fost nevoita sa tai din latimea benzii de 6,5 cm, care era mult prea larga. A fost din intamplare, dar m-a facut sa inteleg de ce face ea asta: marginile benzii nu se ruleaza daca le tai in timp ce banda este calcata duble, raman 'lipite' una de alta.
You do not have to do this. A neck band cut with the final width, without extra trimming, works as well, even if it is not as easy to apply it, if the edges roll.
Nu e nevoie sa faceti si voi asa ceva. O banda taiata la latimea definitva se poate coase foarte bine, chiar daca e o idee mai putin simplu de aplicat.

NB. I cut the band with 3/8" (2 cm) extra length, which will be the seam allowances when I close it.
Banda o tai cu 2 cm in plus pe lungime, ca sa o pot coase.
PREPARING THE NECK BAND AND THE BODICE / PREGATIREA GATULUI SI BENZII PENTRU CUSUT
Press it double while it is flat. It is much more difficult to press double a neck band, if it is already closed.
Presati banda in doua pe lungime inainte de a o coase sa formeze un cerc. Este mult mai greu sa o calci, dupa ce ai cusut-o.
Sew the short edges of the neck band and trim the seam allowances. Use a straight stitch (I use 2.0 - 2.5 length).
Se cos dupa aceea capetele pe linia marcata si se taie tivul de 1 cm la 0.5 cm. Cos cu pas drept de 2.0-2.5.

Turn the neckband and press it, on the right side.
Se intoarce acum banda pe fata si se mai calca inca o data (tivurile se desfac si se suprapun).
'QUARTER' THE NECK BAND AND THE BODICE NECK / IMPARTITI BANDA SI GATUL IN SFERTURI EGALE
Start pinning together the centre front to the centre back on the bodice. Walk the edges of the cutting edge together to find the other points to quarter the neck cutting edge. You can see that these points are not on the shoulder.
Puneti un ac de gamalie la gat, pe mijlocul fetei si pe mijlocul spatelui. Dupa aceea suprapuneti aceste doua ace si prindeti-le cu un alt ac de gamalie. Suprapuneti tivurile si aflati unde sunt cele doua puncte care macheaza sferturile gatului (poza de mai jos). Veti vedea ca aceste puncte nu sunt pe linia umarului.

The more scooped the neck line is, the bigger the distance from the shoulder line will be, because a scooped front neck will be much longer than the back neck and when you quarter the length... Easy to understand, don't you think?
Cu cat este gatul mai decoltat, cu atat lungimea liniei de gat de la fata va fi mai mare decat gatul de la spate si acele de gamalie vor fi si mai mult plasate spre mijlocul fetei. Dat fiind ca avem nevoie de sferturile matematice ale liniei de la gat, nu mi se pare gru de inteles.
The minimum of marking points are 4 (quartering the neck line). I like to put 4 more extra pins, which will divide my neck line and the band by 8, not by 4.
Minimumul de puncte de care eveti nevoie ca sa puneti banda de la gat este de 4 (impartirea in sferturi). Eu prefer sa impart si fiecare sfert in doua, deci am 8 segmente egale, nu 4.
Divide the neck band by 4 or by 8, using the same method.
Acum impartiti si banda de la gat in 4 sau 8 segmente egale, folosind aceeasi metoda.

Pay attention how the pins are placed. It is easier to see them when you pin the neck band to the garment.
Fiti atente cum sunt acele puse, care este directia varfurilor. E mai usor sa le vezi si sa le scoti, daca le pui in acest fel.
PINNING THE NECKBAND TO THE BODICE / ATASAREA BENZII LA GATUL CORSAJULUI
Place the neck band on the RIGHT side of the garment, as you can see in the picture below. The seam line (where you joined the neck band in the round) should be placed on the centre back. It has two advantages: (1) it is not visible on the front (I made once the mistake to put it on the centre front; not a crime, but also not very nice) and (2) you can teach young children which is the back of the garment, if they look for that little seam.
Puneti banda cu fata pe FATA corsajului, asa cum arat in poza de mai jos. Cusatura de pe banda trebuie pusa pe mijlocul spatelui, pemntru ca avenm doua avantaje: (1) nu se vede cusatura pe fata tricoului si (2) ii puteti invata pe copii mai mici care este spatele tricoului, cand se imbraca singuri: acolo unde este cusatura de pe banda.
Acum trebuie sa va marturisesc ca eu am gresit o data si am pus cusaura benzii pe mijlocul fetei. Nu este o crima, dar nici nu sunt mandra de acea banda si de cum arata gatul.

Start pinning the neck band to the garment at the centre back (the pin in the right corner, below)...
Incepeti sa puneti ace de gamalie pornind de la centrul spatelui (acul de gamalie dindreapta, jos, in poza de mai jos)...

... than pin the next 2 pins on the neck band and the garment together: the 2 pins one on the top of the other, in the picture above; the third pin in the picture below.
I put another pin between them, stretching the neck band to equal the portion of the neck between the 2 pins.
... apoi puneti un ac de gamalie acolo unde se suprapun urmatoarele ace de gamalie de pe banda si de pe gat (cele doua ace de gamalie suprapuse, in poza de mai sus si acul al treilea din poza de mai jos).
Eu mai pun inca un ac intre ele (poza de mai jos), exact la mijlocul distantei dintre cele doua ace deja puse. Pentru asta trebuie sa intind putin de banda, ca sa fie egala in lungime cu portiunea respectiva de gat.

I have to stretch, because - as you can see below - the neck band (double layer) is narrower than the neckline on the bodice.
Trebuie sa intindeti putin de banda, pentru ca vedeti (mai jos) ca gatul de pe corsaj este mei lung.

Don't worry if the neck looks now like a porcupine with so many pins. I shall take them off, after I baste the edge of the neck.
Nu va ingrijorati ca puneti prea multe ace de gamalie si ca gatul va arata ca un arici, inainte de a-l coase. Acele de gamalie se scot, in timp ce insailez gatul.

BASTING THE NECK BAND TO THE BODICE / INSAILAREA BENZII
I like to baste the neck band to the bodice. Why I do that? Because I can get rid of all those pins and I keep the layers together when I stitch the neck band. Stitching will be a breeze! Especially for beginners.
Am descoperit ca metoda mea de insailare a benzii de la gat ma ajuta sa cos mai usor: scap de acele de gamalie si nu mai trebuie sa trag de banda si sa aranjez marginile cand cos. Cusutul devine in acest fel 'floare la ureche'. Recomand mai ales incepatoarelor sa faca asa.
I am stitching from the WRONG side, where I already marked the neck line before I started to sew the shoulder line. This is an important step for me, which allows me to have a perfect neck line, without stretching and pulling the fabric to match the edges to a certain point on the throat plate or the foot. I sew on the line, very easy and simple! With the best possible result.
Another advantage is that the edges will not roll, when I sew or serge.
Cos pe DOSUL tricoului, unde am deja marcata linia de cusut a gatului. Am marcat-o inainte de a coase umarul, dupa cum poate ati observat deja. Marcarea este un pas important, care ma ajuta sa cos o linie de gat perfecta. Nu trebuie sa ma stresez daca marginile sunt perfect aliniate cand cos, nu trebuie sa trag in toate partile de banda sau de corsaj, daca fug de sub ac. Nu trebuie sa ma chinuiesc sa urmaresc constant un anumit punct de pe piciorus sau de pe placa masinii de cusut, ca sa stiu ca banda va avea aceesi latime peste tot.
Cos foarte simplu pe linia marcata, stiind ca rezultatul va fi perfect.
Un alt avantaj este ca marginile nu se ruleaza cand cos sau cand surfilez.

I baste with the cheap cotton basting thread, which will be cut off when I serge, as you will see. I baste with small stitches, as close to the edges as possible, stretching the neck band's edges to match the bodice edges.
Insailez cu ata de bumbac prost, pentru ca nu trebuie sa o scot din cusatura. O tai cand surfilez (sau dupa ce as trage un zigzag, cand finisez cusatura interioara). Insailez cu pasi cat mai mici si am grija ca cele trei straturi sa se suprapuna pe marginea taiata.
Below is the neck with and without pins. Sewing two nightgowns at the same time (for twins or not) gives me the opportunity to show how the sewing evolves.
Vedeti mai jos gatul pregatit sa fie cusut: unul are inca ace de gamalie, al doilea este deja insailat. Cusand doua camasi de noapte in acelasi timp (pentru gemene sau pentru alti copii) pot sa fotografiez doua stadii de cusut, unul langa altul.

The marking line of the neck band to the right is an accident. Ignore it!
Linia care se vede desenata pe banda din stanga e un accident. Ignorati-o!
I sew on the wrong side, on the marked neck line with the small zigzag stitch, because I want the band to be elastic. Children have proportionally much bigger heads than adults.
Cos pe dos cu zigzag ingust (1.5 x 1.5) fiindca doresc ca banda sa fie elastica. Copii au un cap (relativ) mai mare decat adultii.

When I sew, I stretch the band to match the bodice. Don't stretch the bodice, only the band! Don't stretch to sew on a straight, vertical line, but follow the way the neck line is on the garment: ROUND!!! You have to keep the bodice completely flat and in the original form and stretch the band to match it.
Cand cos, am grija sa intind banda ca sa fie de aceeasi lungime cu portiunea de gat de pe corsaj pe care o cos. Corsajul nu trebuie intins!!!
Cand coaseti nu trebuie sa intindeti banda ca sa coaseti pe o linie dreapta, verticala. Trebuie sa coaseti pastrand linia gatului curba, asa cum este pe tipar. Corsajul trebuie sa isi mentina forma originala si banda intinsa sa se adapteze formei corsajului.

The neck band is attached to the bodice (below). As you see I have a wide seam allowance I have to trim. I like having this wide seam allowance of 1/2" (the width of my seam allowance on the neck of the bodice pattern pieces), which will make trimming with the serger much easier than a seam allowance of 1/4".
Acum am cusut deja banda de gatul tricoului (poza de mai jos). Tivul este - dupa cum vedeti - destul de lat. Mai exact, are latimea tivului de la gat (1,25 cm). Find atat de lat, imi va veni mai usor sa sufilez la overlock. Tivul final, dupa ce surfilez, va fi de 0,5 cm (mai exact 0,6 cm).

SERGING THE SEAM ALLOWANCE OF THE NECK BAND / SURFILAREA LA OVERLOCK
I will write about it shortly, because not everybody has a serger and those using it, will understand very well what I mean to say.
Am sa scriu acum ceva, foarte pe scurt, despre felul in care surfilez. Nu toata lumea are o masina de surfilat si cine are, intelege ce vreau sa spun.

I learned from Martha Pullen that you never start at the centre back (like I did before), because the seam allowance of the neck band it always shows on the back of the garment, when you do not wear the it.
You start on the front, just below the shoulder seam.
Am invatat de la Martha Pullen ca nu trebuie sa incepi sa surfilezi la mijlocul spatelui, asa cum incepi sa cosi banda si cum surfilam eu inainte. Tocmai partea de la mijlocul spatelui este partea care se vede, atunci cand nu porti haina.
Incepi sa surfilezi pe piept, sub cusatura umarului.
May be I shall write another time how I start and finish on the serger.
Poate am sa scriu alta data cum se incepe si cum se incheie cusatura la overlock.
This is how the neck looks before being pressed and topstitched.
Iata cum arata gatul inainte de a fi calcat si cusut cu cusatura finala, decorativa.

PRESSING AND TOPSTITCHING THE NECK BAND / CALCAREA SI ULTIMA CUSATURA
You press the neck band on a hem. Then you top stitch it.
Intai se calca gatul pe o pernuta de calcat si apoi se mai caose inca o cusatura ca sa previna banda sa se ruleze.
You can use a double needle (I do not use it), or a cover lock (I have it, but I do not use it, because I hate the idea that pulling one thread will unravel my whole topstitching; you see, I like to make things to last very long).
Puteti folosi un ac dublu (nu fac!) sau un overlock (am si masina asta, dar nu-mi place sa o folosesc, pentru ca detest ideea ca daca se rupe ata de pe dos, toata cusatura se va desira; imi place sa fac lucruri de care stiu ca sunt foarte rezistente).
I like using the sewing machine. To be honest, the most important motif is that I do not have to switch to another machine. I only go as far as the serger, which I learned to love very slowly (Ela from Focsani could testify how reluctant I was to buy a serger).
Mie imi place sa folosesc masina de cusut. Ca sa fiu sincera, motivul principal ester ca imi e lene sa ma mut pe alta masina. Singura exceptie este masina overlock, pe care am inceput sa o apreciez incet cu incet. Ela din Focsani poate depune marturie cata aversiune am avut la inceput ca sa cumper un overlock).
This is the zigzag stitch ...
Asta este punctul simplu de zigzag...

... and this is the honey comb stitch
... si asta este punctul decorativ 'fagure de miere'

I overlap 2-3 stitches when I finish the round neck, I backstitch 2-3 stitches, I cut the thread, leaving long tails, I pull the top thread to the back, make a knot and burry it in the seam. You can see the tails in the first picture of this posting.
Cos pana ajung la punctul de pornire. mai cos 2-3 pasi peste ce este deja cusut, dau 2-3 pasi inapoi si apoi tai, lasand capetele de ata mai lungi. Trag ata de sus pe dos, fac un nod dublu si ' ingrop' atele in tiv.n prima poza, cea cu care am inceput postarea, puteti vedea firele de ata, inainte de face nodul.
In that picture you see that I made the mistake to start the topstitching at the centre back and the back sticking is visible. I should have followed Martha Pullen's advice to start on the front side, near the shoulder seam!
In aceeasi poza mai vedeti ca am gresit si am inceput sa surfilez pe mijlocul spatelui. Trebuia sa fi urmat sfatul dat de Martha Pullen sa incep pe piept, sun cusatura umarului.
One more pressing and your neck is nicely done! You may like to sew with 4 pins, without basting, but this is how I sew.
Am calcati inca o data si - nellyk - ai terminal si gatul. Poate preferati sa coaseti cu 4 ace de gamalie pe banda si fara insailt. V-am aratat numai cum fac eu.
OTHER POSTINGS FROM THESE SERIES / POSTARI ANTERIOARE DIN ACEASTA SERIE:
Construction of a knit nightgown (I) / Cum se coase o camasa de noapte din tricotaj (I)
Construction of a knit nightgown, shoulders (II) / Cum se coase o camasa de noapte din tricotaj, umerii (II)


